The content of the article:
- When to adjust the headlights
- Setting the headlights yourself
- Car preparation
- Control bench creation
- Headlight adjustment
- Configuring PTF
- Folk way
Every car enthusiast knows that it is impossible to drive without head (front) lighting! At the same time, even experienced drivers do not always understand the importance of correctly adjusting the car's headlights. If the lighting setting is not done correctly or not at all, then there is a high probability of dazzling drivers driving in the opposite direction, which can lead to a head-on collision or other dangerous accident.
Besides, Incorrectly adjusted headlights significantly reduce the visibility zone and in rainy, snowy or foggy weather have the opposite, negative effect. For example, a wide and highly directed beam “shines” the space in front of the car and creates an impenetrable light curtain for all road users, provoking a potentially dangerous emergency.
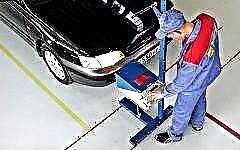
You can adjust the headlights at the service station (service station) or yourself. Headlight adjustment at the service station will also be paid with the use of professional equipment, but not every driver can afford to spend funds from the family budget for service at the service station. And the service stations themselves are sometimes located too far from small settlements.
When to adjust the headlights

Roads are different (especially Russian), and all kinds of things happen on them. Especially on those that resemble the roads of the war after the bombing, with pits and bumps. On such roads, not only the wheels "fly off" from the ball bearings, but also "shake off" (go astray) the settings of the headlights.
In addition, it is imperative that the headlights be adjusted in the following cases:
- If necessary, install PTF (fog lights).
- In case of an accident with damage to the front elements of the body.
- After suspension repair.
- When replacing rims or tires on them.
Setting up the headlights yourself

Several car manufacturers, as well as lamp manufacturers, offer their own methods for adjusting headlights. Usually their methods are attached to the technical manual for the machine.
Along with this, there is also a universal, independent way of adjusting the headlights, suitable for almost all cars, in which a number of the same actions and conditions are performed, which largely coincide with the methods of manufacturers. In general, the independent process of adjusting the headlights involves several simple steps, described below.
Car preparation

Before you start adjusting the headlights of your car, you need to prepare the car itself. And at this stage it is strongly recommended to take into account the specific operating conditions of the car. For example, consider how often a machine is used with a non-standard (non-factory) load.
The fact is that most of the proposed headlight adjustment methods are averaged. Their methodology is "sharpened" for the average operating conditions of the car - the average "curb weight" (the total weight with the basic minimum configuration: the average weight of the driver (75 kg) excluding the weight of passengers, weight of tools and spare wheel, tire pressure, etc.). This is especially true for those car owners who most often use their "iron horse" only for the transportation of small-sized cargo, for their own economy or earnings.
Preparing the car for adjusting the headlights consists of a few fairly simple steps:
- Clean the housing and adjusting screws (or screws) from dirt. The location of the adjusting screws can be found in the instructions for the car or headlights. You can use plain clean water to remove dirt, and organic solvents to remove oil from the elements. Use air purge whenever possible.
- Moisten the adjusting screws with anti-corrosion liquid. Make sure that the surfaces of lenses and reflectors are free from defects that distort the luminous flux.
- The vehicle must be parked on a level, horizontal surface.
- All foreign objects are removed from the trunk and only regular ones are left: a spare wheel, a factory tool, etc.
- Bring the tire pressure to the factory standard. All tires on disks must be of the same size and free from visible defects. The discs themselves must also have a flat surface, without deformation.
- The fuel tank must be at least 50% full with fuel.
- The machine should be loaded so that it weighs approximately the same weight as on the most frequent trips. The weight of the load must be evenly distributed on all axles. Containers filled with water or other items can be used as cargo.
- Secure the wheels of the car with wheel chocks.
Creation of a control stand (screen)

Most often, a flat wall is used as a screen with markings to adjust the lighting. Also, some drivers make special plywood boards with wooden slats nailed to them, which serve as reference lines instead of the usual drawn lines. Sometimes, if the size and evenness of the site allow, a garage door is used as a stand.
Adjustment markings on the stand are done as follows:
- The car is adjusted to the stand (wall) close.
- Three control points are marked on the stand: two are opposite the centers of the axes of the lamps, the third is applied in the middle between the first two and must correspond to the middle of the machine. Thus, three points should appear on the stand: one opposite the center of the machine and two opposite the centers of the axes of the lamps. It is better to denote these points with letters, for example, the middle - "V", and the points on the sides (opposite the axes of the lamps) - "C" and "C".
- The machine rolls away from the stand by 7.5 meters (with a separate setting of high-beam lighting - by 10 meters).
- Vertical lines are drawn through each of the three points marked on the stand ("C", "V", "C").
- A horizontal line "1" is drawn, which must pass through the designated control points: "C", "V", "C".
- Draw a horizontal line "2" below the line "1" by 5 cm. (With a separate setting of high-beam illumination - lower by 12 cm.).
- The letter "B" can denote lateral points (centers of crosshairs) at the intersection of vertical lines with the horizontal straight line "2".
Headlight adjustment

Lamps are of 2 types: separate or with a combination of low and high beam. In combined lamps, the light flux is regulated by the low beam, and the high beam is automatically adjusted. In separate bulbs, the adjustment of the high and low beam will have to be done separately.
According to GOST, the lower limit of light and shade for low-beam lighting is not regulated, while there are certain conditions for the upper limit: on the left side, the border of the light flow should be horizontal (so as not to blind oncoming drivers), and on the right, it should rise, illuminating the roadside and pedestrians. This rising edge of light is often referred to as a jackdaw.
By the way, in countries where there is left-hand traffic, the ascending "jackdaw" should be on the left. Accordingly, in countries where the movement is right-hand, the "jackdaw" should be on the right.
The procedure for setting headlights with combined low and high beam
- Place the machine at a distance of 7.5 meters from the stand.
- Turn on the low beam.
- Cover one of the headlights with a thick cloth or a sheet of cardboard. Only the headlight that will be regulated remains open.
- Using the adjusting screws, adjust the headlights so that the lateral vertical lines are in the middle of the light spots. And the horizontal line "2" was on top and touched the borders of the spots (as if lying on them).
The high beam will adjust automatically.
The procedure for adjusting headlights with split dipped and main beams
- To adjust the dipped beam separately, carry out the previous steps above (adjusting the headlamps in combination).
- Place the car at a distance of 10 meters from the stand.
- Turn on the high beam and close one of the headlights.
- Using the adjusting screws, direct the light spots so that they accurately fall into the crosshairs formed at the intersection of line "1" with the vertical side lines at points "C" and "C". That is, the center of the crosshair should be in the center of the light spot.
Setting up PTF (fog lights)

Fog lights (PTF) should be installed parallel to the longitudinal axis of the vehicle. Setting up fog lights is not much different from the method for setting up headlights and consists of the following steps:
- Lanterns are cleared of dirt.
- A flat area is selected for the car.
- The car is adjusted close to the stand (wall). On the wall, points are marked opposite the center of each fog lamp, and between them - a point opposite the center (middle) of the car. Thus, there should be three points, which can be designated as: the middle - "V", the points on the sides - "C" and "C".
- The machine is installed at a distance of 5 meters from the wall.
- A vertical line is drawn through each of the three points ("C", "V", "C").
- A horizontal line "1" is drawn, connecting three points "C", "V", "C". Thus, at the intersection of the horizontal line "1" with the vertical lines, crosshairs should form.
- A horizontal line "2" is drawn, 10 cm below the line "1".
- The light spots of the fog lights are adjusted so that they exactly fall into the lateral crosshairs obtained when the horizontal line "2" crosses the vertical lines of the lateral points "C" and "C".
"People's way"

Adjusting the light in the "folk way" should be done only in the dark, and not in conditions of insufficient visibility!
The car is parked on a flat road. Ahead, strictly in front of the car and exactly across the road, at a distance of 20 - 25 meters, a large stick is placed. The dipped beam turns on and one of the headlights is closed (if there is a partner, he can cover it by standing in front of it).
Then, using the adjustment screw, the upper limit of light and shade is brought to the stick on the road. Adjustment in the direction of flow, so that the light is straight, is done "by eye" when the high beam is on (in the low beam, the beam may go slightly to the right).
Conclusion
The process of self-adjusting headlights is not as difficult as it seems at first glance. It is enough to do this once, and in the future self-adjustment will be easy and quick. At the same time, one should not forget that the timely and correct adjustment of the headlights is an important procedure on which the safety of traffic at night is seriously dependent. But which, unfortunately, is often neglected even by experienced drivers!