Contents of the review:
- What are "angel eyes" for?
- "Angel Eyes" and their color
- Plexiglas products
- Using LED strip
- Which is better to use, LED or CCFL
- Installing "Angel Eyes" yourself
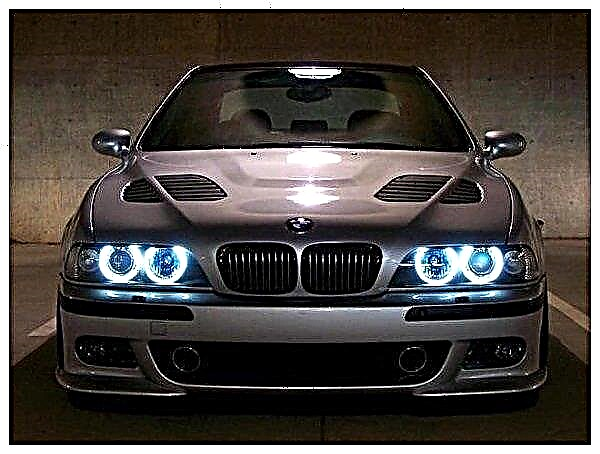
Currently, tuning your headlights with your own hands is perhaps the simplest option for improving the exterior of the car. Increasingly popular in the driving environment began to use "angel eyes". They are luminous rings that are embedded in the optics of the car. The pioneers in this area were BMW, and many motorists who liked the innovation followed them.
What are "angel eyes" for?

"Angel Eyes" have become an integral part of modern tuning. When switched on, they can act as parking lights that can highlight the car. On an impenetrable night, this can significantly increase the level of security. "Angel Eyes" consume an insignificant amount of electricity - they are not able to provoke a quick discharge of the car battery.
"Angel Eyes" and their color

Colors of "angel eyes", and in what cases they can be installed on the car:
- yellow, red, green, orange, purple - allowed to be used as tuning on show cars;
- white, blue - can be used in everyday use, as a backlight and dimensions.
In other words, the operation of "angel eyes", except for white ones, does not comply with the rules governing the use of lighting devices. Their presence gives the traffic police the right to issue a fine, warn the driver in an official manner and be sure to withdraw non-standard lighting equipment. This prohibition also applies to multi-colored "angel eyes", that is, those whose color can change.
Plexiglas products

Practically everyone can make "angel eyes" from plexiglass. To do this, you need to prepare:
- 8 LEDs at 3.5V;
- 8 resistors with a nominal value of 2200 Ohm;
- Sheet plexiglass or round rods from it.
If the rods could not be found, then 1 cm by 1 cm bars are cut out of the plexiglass sheet. To determine their length, it is enough to measure the circumference of the headlights.
The resulting blanks must be rounded. For this, it is advisable to use a grinder. But you can do this work by hand, using a piece of sandpaper. In the end, you should end up with three round rods, not just machined, but also polished.
Next, the workpieces need to be bent, giving them the shape of a headlight. For this purpose, it is best to use a building hair dryer. In advance, you should find a round object, the diameter of which coincides with the size of the headlights. The preheated blocks must be bent over a stencil and allowed to cool down so that they take the desired shape. All surplus must be removed.
At the ends of the blanks with a drill, holes must be made into which diodes will be inserted. They are connected to the wires that supply power to the side lights. The positive terminal of the diode is connected to the positive wire, and the negative terminal to the negative one. Ballast resistors are soldered at a distance of about 15 cm. You can use nail polish to attach the diodes to the holes.
All connections must be properly insulated. If there is a desire to make the "angel eyes" radiant, then cuts are applied along the entire length of the rods, the depth of which should not exceed 1/3 of their diameter.
Using LED strip

Rings with two LEDs have significant disadvantages. First, it is their openness. Secondly, they have insufficient brightness, which does not allow them to be used as navigation lights. These drawbacks can be easily avoided if LEDs are used to make angel eyes. For this you will need:
- A small sheet of plexiglass. Its thickness should not be less than 5 mm, but the use of material thicker than 7 mm is also impractical.
- Hacksaw blade for metal.
- Ballerina - this is what is commonly called a device that allows you to cut round holes of large diameter.
- A tape with a large number of LEDs per 1 meter of length.
- Diffusion film.
- Transparent glue.
- aluminum heat-resistant tape.
- Soldering iron with solder.
- Wires with terminals.
- Heat-shrink tubing.
The markings of future rings are applied to the glass surface. Then they are cut out. And first of all, the outer diameter should be cut. For this purpose, it is best to use either a hand jigsaw or a ballerina. It is not recommended to perform this work with an electric jigsaw, since the plexiglass will melt along the edge of the cut.
The size of the cut out workpiece must be checked again by attaching it to the headlight. If there is a need for this, then the workpiece needs to be corrected. Only then can the inner contour be cut.
To achieve a better glow, the outer part of the ring is pasted over with a diffusing film. If there is none, then the surface can simply be made matte by treating it with fine sandpaper.
The tape is now installed. True, before that, wires are soldered to it. The place of soldering must be filled with silicone sealant. Also, before installation, it makes sense to check the operation of the structure by connecting it to a 12 V power supply.
Which is better to use, LED or CCFL
We do not have an unequivocal answer to this question. Therefore, we provide lists of the advantages and disadvantages of each of them.

The luminous element in Angel eyes CCFL is a luminous neon tube, which is covered with a protective plastic casing. Their pluses:
- The light is distributed evenly over the entire ring.
- Does not respond to vibrations and shocks.
- The emitted light is softer than that of diode counterparts.
- Relative cheapness.
- The electricity consumption is very low.
Negative nuances:
- Starting is carried out through inverters (ignition units), which fail before the end of the life of the backlight ring itself (20,000 hours).
- To achieve the maximum brightness of the glow, it takes about 2-3 minutes after connecting.
- The brightness is significantly lower than that of LED.
- The service life is half as much as for diode ones.
Angel eyes LED consist of LEDs that are soldered onto a solid base.

The main advantages of this version of the "angel eyes" include the following:
- The brightness of the glow is so high that they are perfectly visible during the day and they can be used as navigation lights.
- The service life exceeds 50,000 hours.
- Not susceptible to vibration and shock.
- Low energy consumption.
- The light is distributed evenly.
- It works stably both at -40 ° С and + 100 ° С.
The negative aspects of LED are the spotlight and high price. In addition, if one LED burns out, then the entire ring has to be replaced, since selective replacement is problematic.
Installing "Angel Eyes" yourself

How to install these products yourself, I want to know many car owners who like to modernize the appearance of the car. But high-quality tuning in the absence of proper optics cannot be considered as such.
Let's look at the process using the example of installing neon tubes. First you need to start preparing the seat in the headlamp. To do this, the headlight will have to be removed.
After that, you will need to dismantle the glass. This should be done extremely carefully. After removing the glass, the grooves in which it was attached are very thoroughly cleaned of sealant residues. Gasoline helps very well in this case.
Long-term operation of the headlamp leads to the accumulation of microscopic debris and dirt in its internal space. They should be removed with an exceptionally soft cloth or cotton swabs. Doing this with unprotected hands is strictly prohibited.
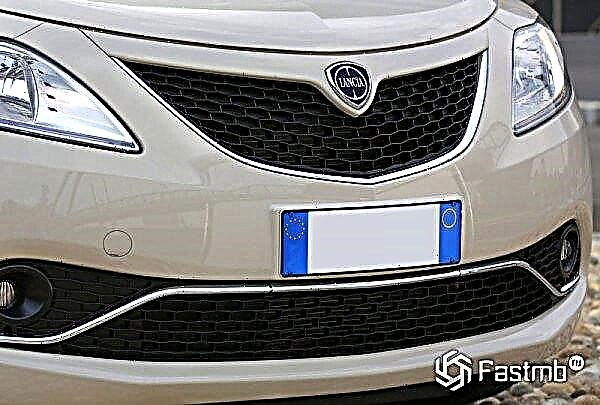
When installing, take into account the aesthetic component. To "angel eyes" perfectly match the color of the car, you need to know some of the nuances. So, for example, for light cars it is better to choose neon ones. If this is not possible, then LEDs are also suitable, but they should emit a bluish color. But the rich white color of the LEDs is perfect for dark and black cars.
After disassembling and cleaning the headlights, you can mount the "angel eyes" in it. This is done quite simply. A colorless sealant is applied to the inside of the ring. After that, the product is superimposed on the surface of the headlamp reflector and is well pressed against it. Connect the device to the car network only after the sealant is completely dry.
The assembled device must be checked for operability, for which power is connected to it. Only then can the headlight be assembled. For this, a layer of colorless sealant is applied to the groove, on which the glass is planted. Again, you should wait until the sealant has completely risen, and only after that the headlight can be put in place and connected.